Hello,
In this post I will be showing you a shading trick that can speed up your workflow to achieve a reasonably believable surfacing for terrains.
We often get terrains that are exported from "World Creator", Houdini etc and most often with messed up uv's... It becomes really annoying and time-consuming to fix it and texture the terrain.
So, there was a solution for this in Mental ray which bakes out object normals and different texture is applied to a different axis.
But in Arnold, we have aiStateVector which basically works the same way. Extracting different axis to mask out plateaus and inclinations.
References:

As you can see in the references, there is snow, grass or sometimes sand on the flatter surface and rocks pocking out of the ground.
This happens due to erosion or the melting of snow in summer. With aiStateVector we are trying to achieve similar results without depending too much on the texturing department.
Here are some renders, that I have come up with. Mind you, this is not focused on achieving realism, but this is to show you the possibilities of what can be achieved. This is just to explain a few tools and techniques.
My Renders:
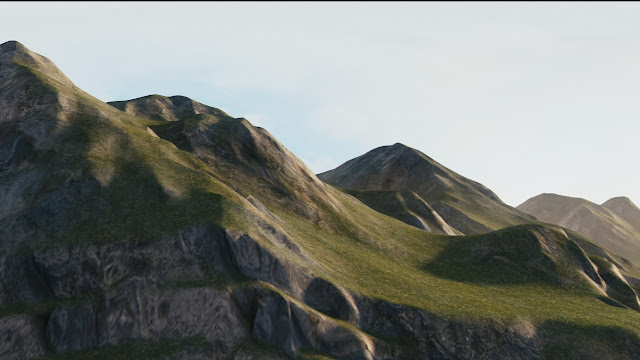

I know this looks pretty average, but as I said this is not focused on realism. My intention here was to keep things simple.
Shading:
We are going to use aiStateVector with "Ng" (Normal geometry) mode selected.
and with a blend color node, we are gonna shuffle different channels. and then with aiRange, we will control how much of rock or snow we are gonna see.
Here is a screenshot of my shading network.
This happens due to erosion or the melting of snow in summer. With aiStateVector we are trying to achieve similar results without depending too much on the texturing department.
Here are some renders, that I have come up with. Mind you, this is not focused on achieving realism, but this is to show you the possibilities of what can be achieved. This is just to explain a few tools and techniques.
My Renders:


I know this looks pretty average, but as I said this is not focused on realism. My intention here was to keep things simple.
We are going to use aiStateVector with "Ng" (Normal geometry) mode selected.
and with a blend color node, we are gonna shuffle different channels. and then with aiRange, we will control how much of rock or snow we are gonna see.
Here is a screenshot of my shading network.


Once we manage to set this up, we can then move on to adding more surface details with displacements.
NOTE: This technique will work only when the object is not moving or rotating through space.
So make sure you apply this to the static terrain, rocks, riverbed etc...
Hope you have learned something. If you need a video breakdown on this, please leave a comment.
Comments
Post a Comment